How To Make a Table Runner for a Book Signing Display

Getting people to stop at your table at a book signing can be a challenge, but a good table runner can have a huge impact. It lets potential readers know what you're about from a distance and entices them in. I recently made my first table runners for Scares That Care and wanted to share some tips and tricks I learned that can save you a ton of time.
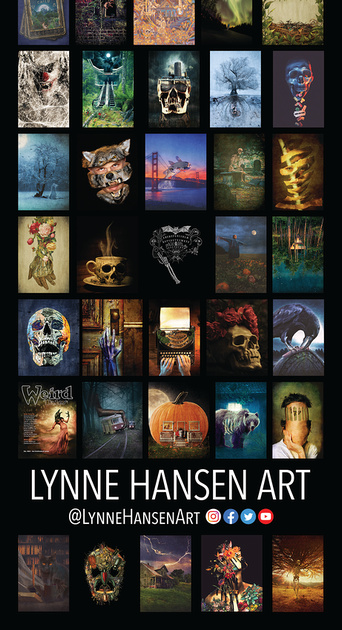
Here's what my table runner looks like in action:
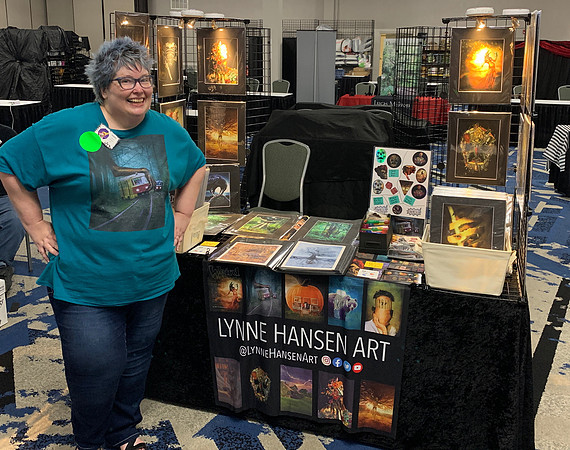

(That's me all sweaty and exhausted after load-in at the convention!)
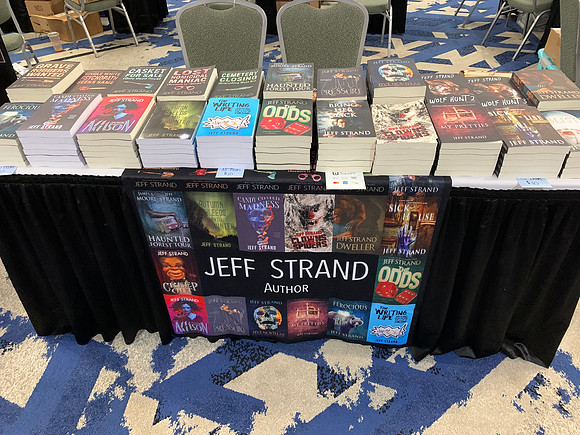
And this is what the one I created for my husband Jeff Strand looks like:
The company I chose was Best of Signs, based on a recommendation from author Thomas R Clark. Their quality was stellar, the colors were bright, and the product even arrived early. The fabric is a polyester twill and didn't wrinkle significantly. The fold marks disappeared shortly after I set the runner on the table.
As of today, you can use the coupon code NEWORDER to get 20% off your first order, but they often have other product-specific specials that can be even better. (That's not an affiliate discount code or anything, just one I found on their site to help folks out.) Here's a list of their current specials.
They have three standard size table runners:
- 2' x 5' ($22.50 as of today)
- 2' x 5.67' ($27 as of today)
- 3' x 5.67' ($40.50 as of today)
I was sorely tempted by the $22 two-foot wide version, but ultimately chose the 3 ft wide version for a couple of reasons:
- I could fit more book covers on the larger size AND make my name larger, AND
- The little extra length lets the back part hang off and keeps the table runner from slipping, AND
- If I ever ended up splitting a table, a 3' version divides the table exactly in half, which is really convenient.
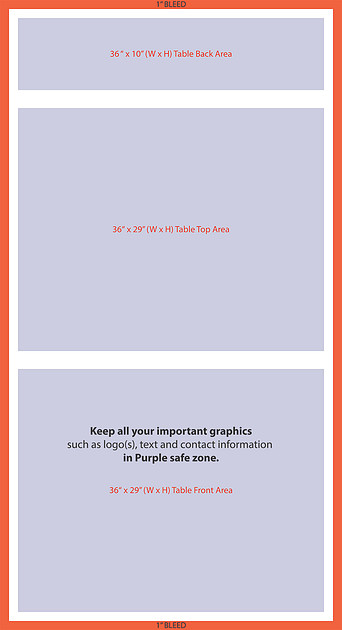
I wanted to design our table runners in Adobe Photoshop, but there wasn't a template on the site, just an online design tool where you upload the images. Since I wanted to include a ton of different books, I wanted something where I could tinker and be more precise. I contacted their customer service and they sent me a download link for a .pdf template. This is what it looks like:
And this is what I created for Jeff using that template:
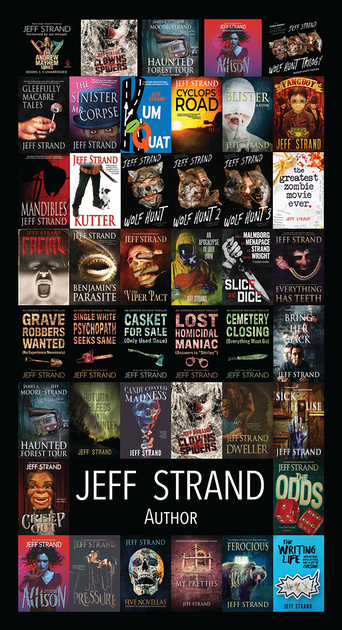
The file is huge, but it's worth the effort. If you size your 6x9 book covers to 2554 px x 1703 px, you'll be able to fit six covers in a row, and three covers tall on the front portion. Ultimately you'll be able to create 7 rows of books and a single row of 5 audiobook covers. That's a total of 38 book covers and 5 audiobook covers. Don't sweat it if you don't have that many books yet. You can make the covers larger on the design or you can repeat the covers. (Think of it more like a pattern than a menu.)
As you can see in the pics above, when you have a packed table, you're not going to see much of the top part of the runner anyhow, so take your time to make sure what you're showing off on the front is your most important work or info. Like your name and tag line.
For Jeff, we went with a very straight-forward "Author" tag line. His covers really speak for themselves in terms of what kind of author he is. For me, I used my social media handle because I want folks to connect with me after the show. Whatever you choose, keep your text clean, simple, and large enough that it can be read from a distance. If your background is dark like one of these, I highly recommend white for the color, too. It'll stand out.
However you design your table runner, make sure you keep your text and images inside the borders provided so nothing important gets cut off. In my design, I added an additional black border around the outside of my table runner just to make sure.
Once you upload your piece, you'll have to choose between two finishing styles--hot knife cut and sewn edges. I went with hot knife cut so that I knew that the table runner would lay flat.
I know this all may seem like a lot, but I've created something special for you to make it a bit easier.
First, I uploaded the template Best of Signs sent me here. It's nice and small and easy to import into whatever design took you use.
However, if you're going to work in Photoshop, you can also download the super-duper large Photoshop file with sample images and sample text here.
Make sure you delete the sample image before you upload it to Best of Signs or your file will be CRAZY large. (It's 1.2 gig just with the sample images.)
I'm so glad I finally took the time to make one of these table runners, and I know you will be, too! Light and easy to carry around to events, (sooooo much better than a banner!) and really lets you stand out from the crowd.
If you make your own, I'd love to hear about your experience! Send me pic! And get out there and sell some books!
NOTE: I first shared this info via my newsletter, so if you'd like to get future tips from me, join my VIP list here.